Profile Setup
Setup User Profile in Stack Console
The Stack Console user profile setup feature allows users to manage their personal information, change passwords, configure payment settings, add users, roles, and monitor account activity. This feature provides users with a detailed overview of their account and allows for customization and control.
Update Your Personal Information
Keep your personal details up-to-date to ensure that your profile reflects accurate information. This section allows you to update essential fields such as name, contact number, and address.
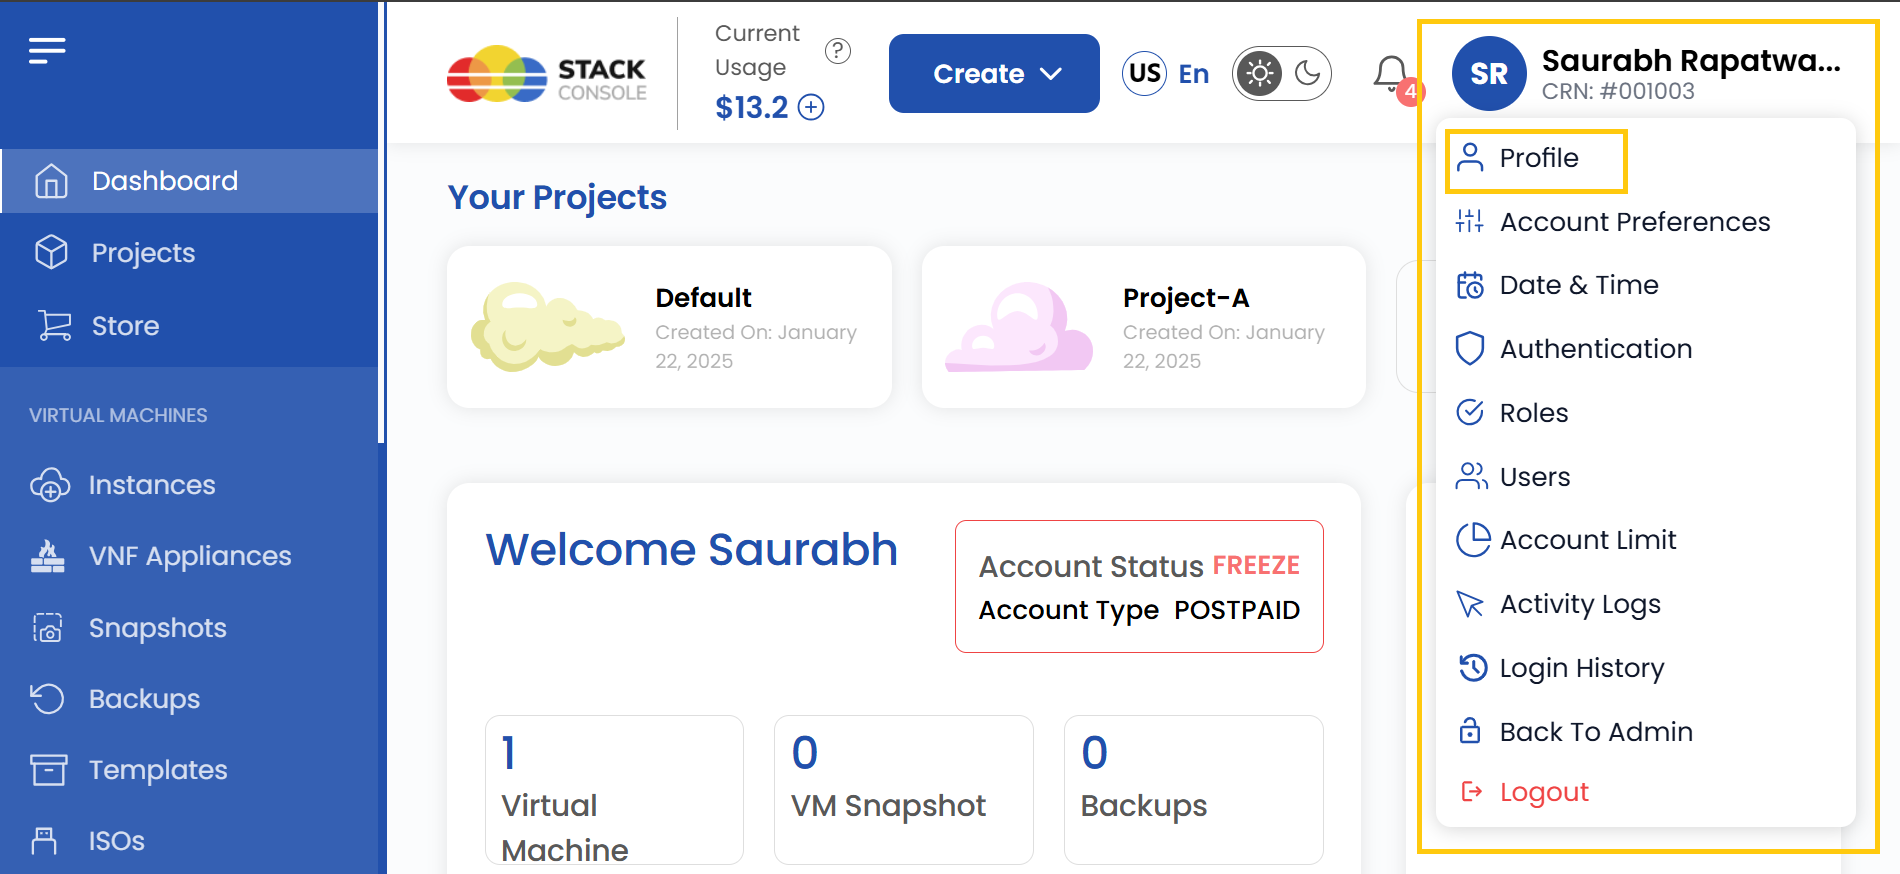
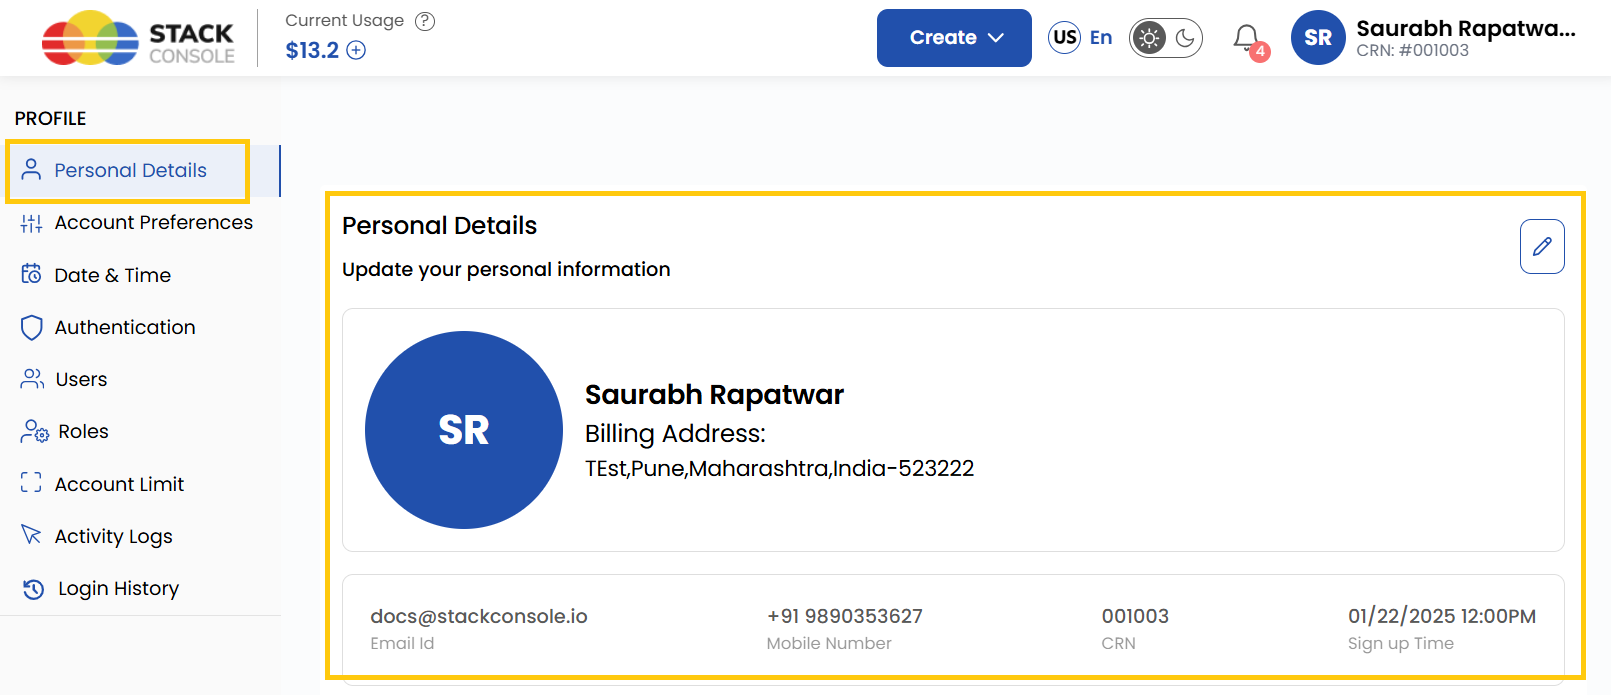
- Navigate to the Profile section from the left-hand menu.
- Select Personal Details to update your personal information.
- Click on Submit to save changes.
Manage Billing Information
Accurate billing information is essential for managing subscriptions and payments. This section allows you to add or update your billing address and phone number for invoicing purposes.
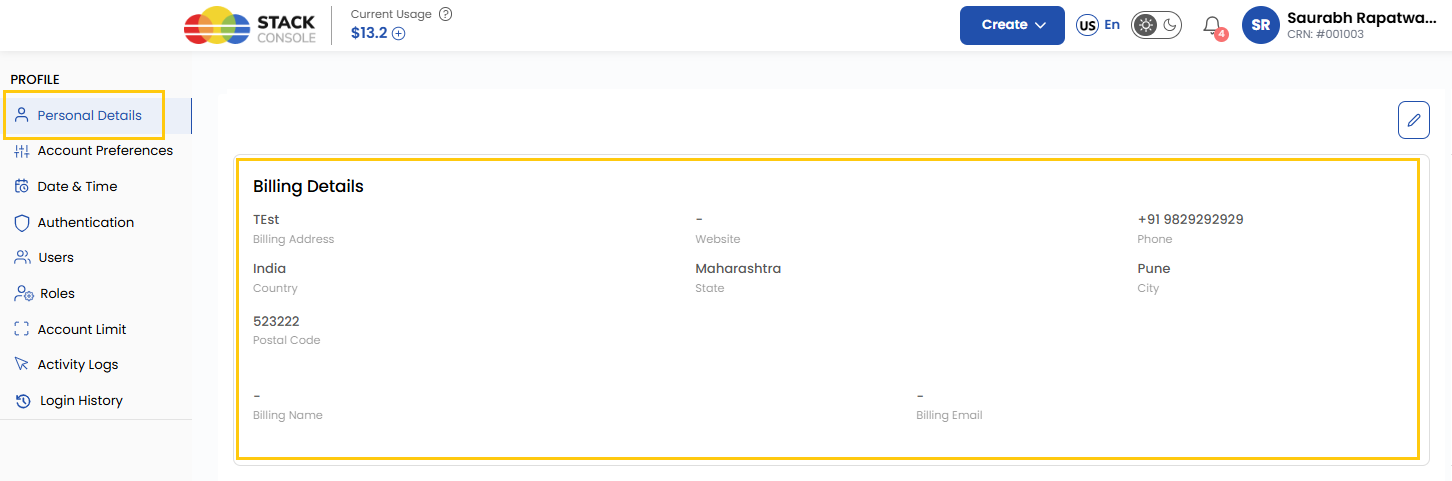
- Navigate to the Profile section from the left-hand menu.
- Select Personal Details and go to Billing Details.
- Add or update the Billing Address and Phone Number.
- Click on Submit to save changes.
Customize Account Preferences
Choose how you interact with the dashboard by customizing your account preferences. This section allows you to switch between different visual modes to match your desired experience.
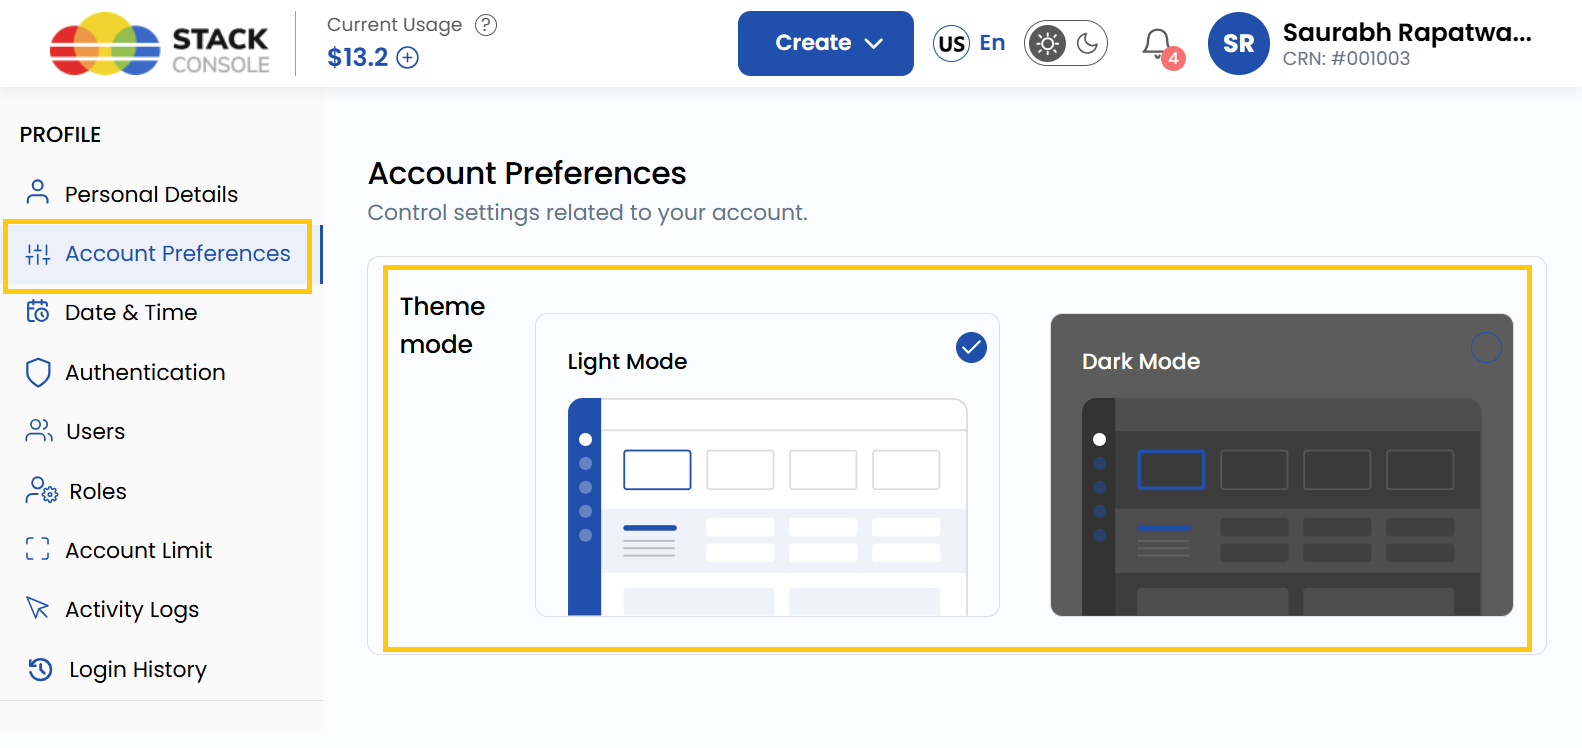
- Navigate to the Profile section from the left-hand menu.
- Select Account Preferences.
- Choose between Light Mode and Dark Mode.
- Toggle your preferred mode, and the changes will be applied instantly.
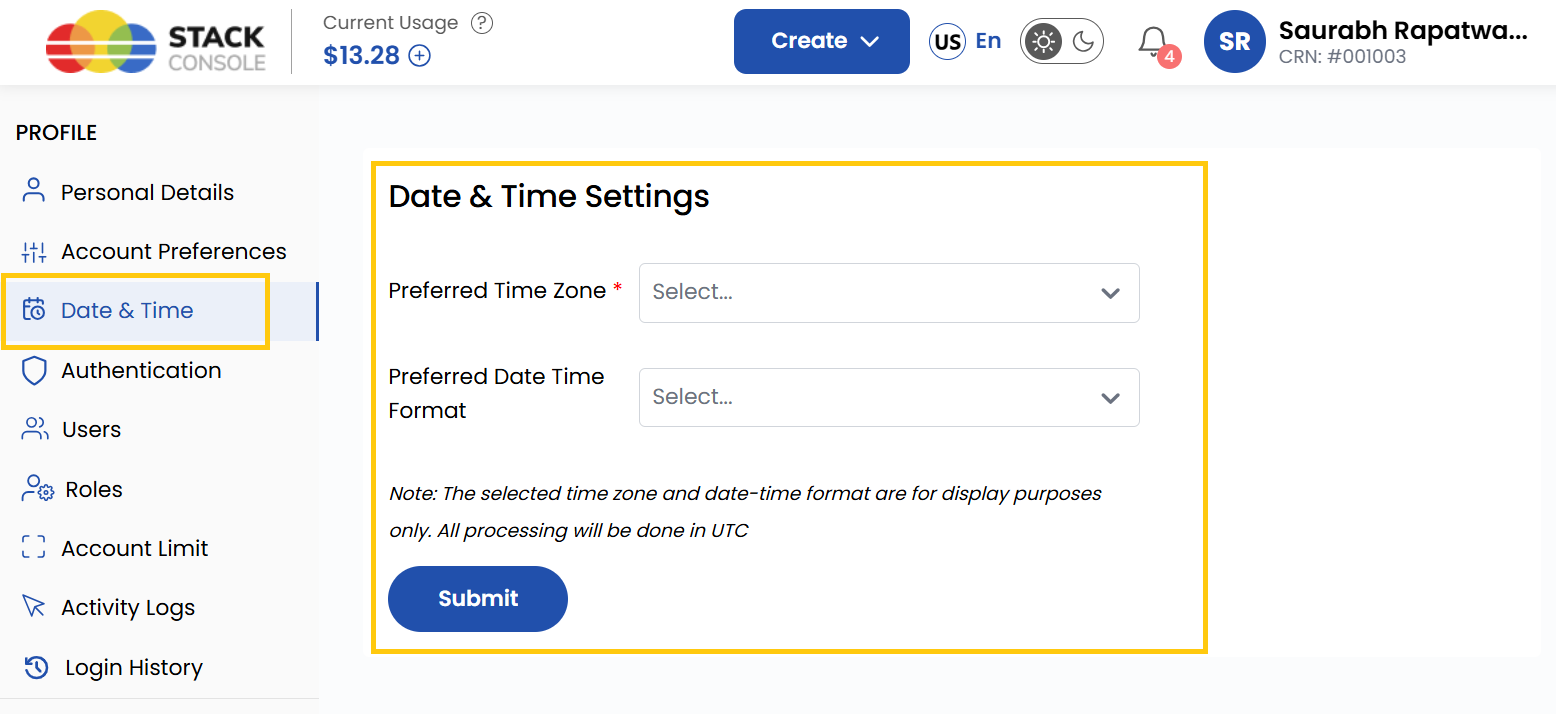
Change Date and Time Settings
Ensure the date and time format aligns with your preference, especially if you're working across different regions.
- Navigate to the Profile section from the left-hand menu.
- Select Date and Time Settings.
- Choose your Preferred Time Zone and Date Time Format.
- Click Submit to apply the changes.
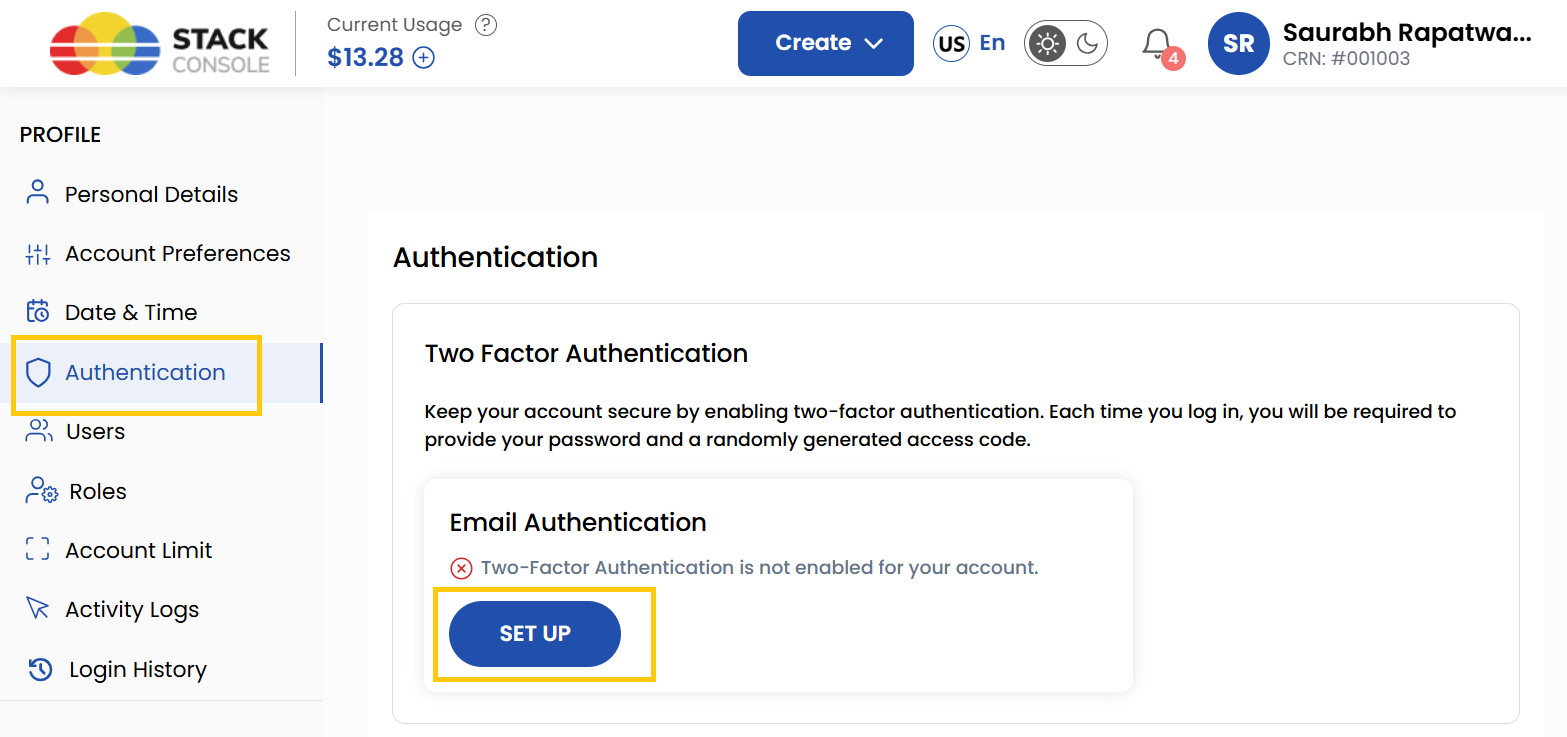
Secure Your Account with Two-Factor Authentication
Enhance security by enabling Two-Factor Authentication (2FA), which adds an additional layer of protection to your login process.
- Navigate to the Profile section from the left-hand menu.
- Select Authentication, then locate Two-Factor Authentication (2FA).
- Click Set Up under Email Authentication.
- Enter your Email ID and click Send OTP.
- Enter the OTP sent to your email.
- Toggle Enable 2FA for All Users if you want it enforced across your organization.
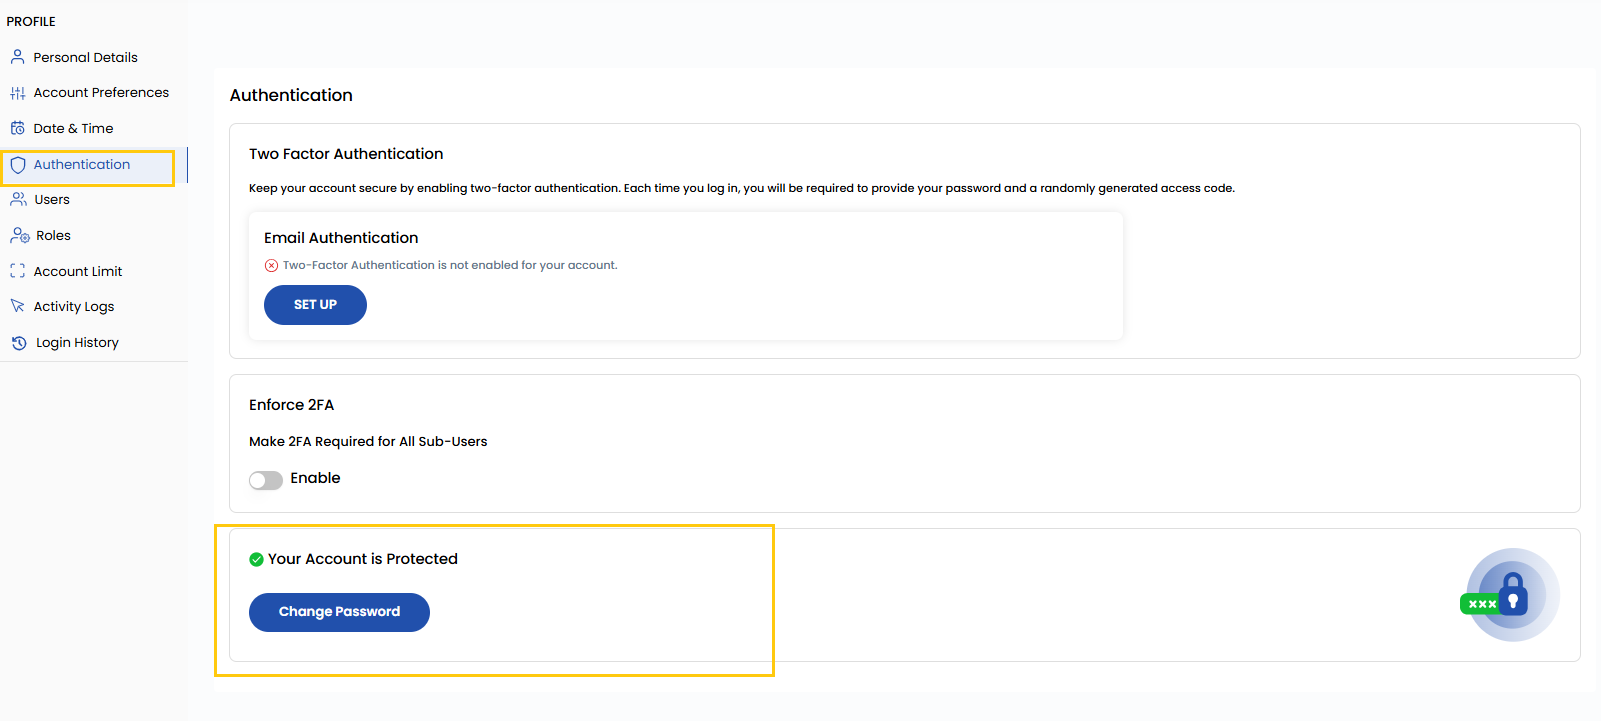
Change Your Password
To maintain account security, it's essential to change your password periodically.
- Navigate to the Profile section from the left-hand menu.
- Select Authentication, then click on Change Password.
- Enter your Current Password, then enter and confirm your New Password and click Change Password to save changes.
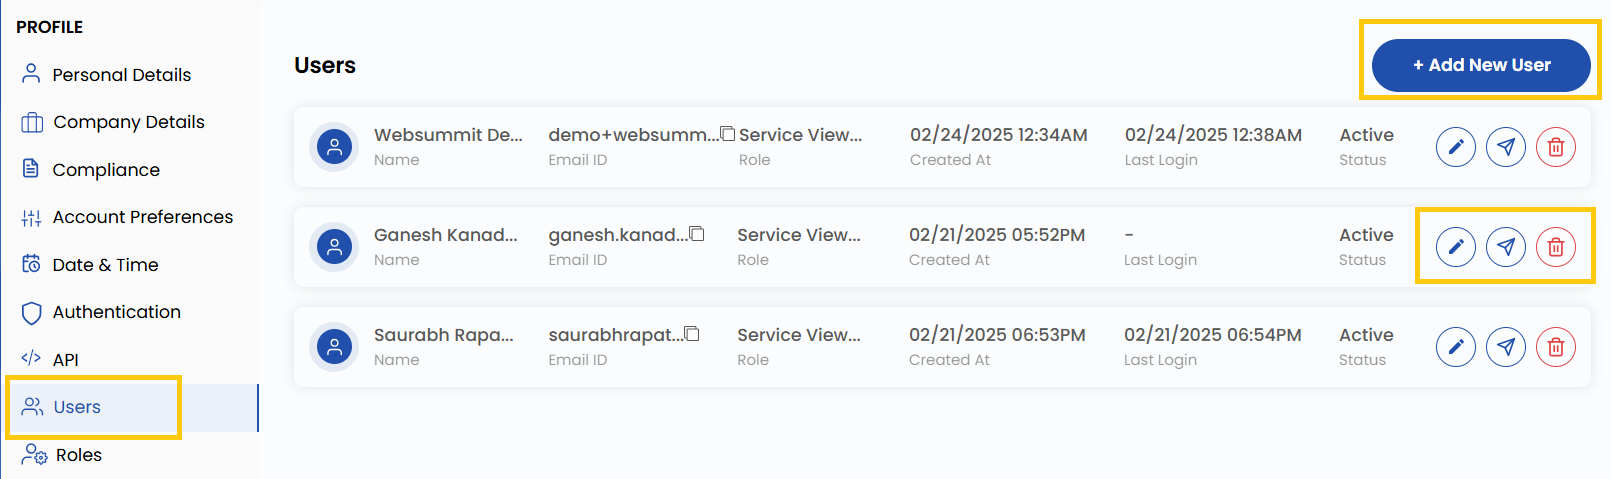
Add a New User
The Users section allows you to add new users to your organization and assign specific roles and permissions.
- Navigate to the Profile section from the left-hand menu.
- You can view Users and manage them by using action buttons to edit and re-invite user. To add user Select Users and click on Add User.
- Enter the user details and select their Role and click Submit to create the user.
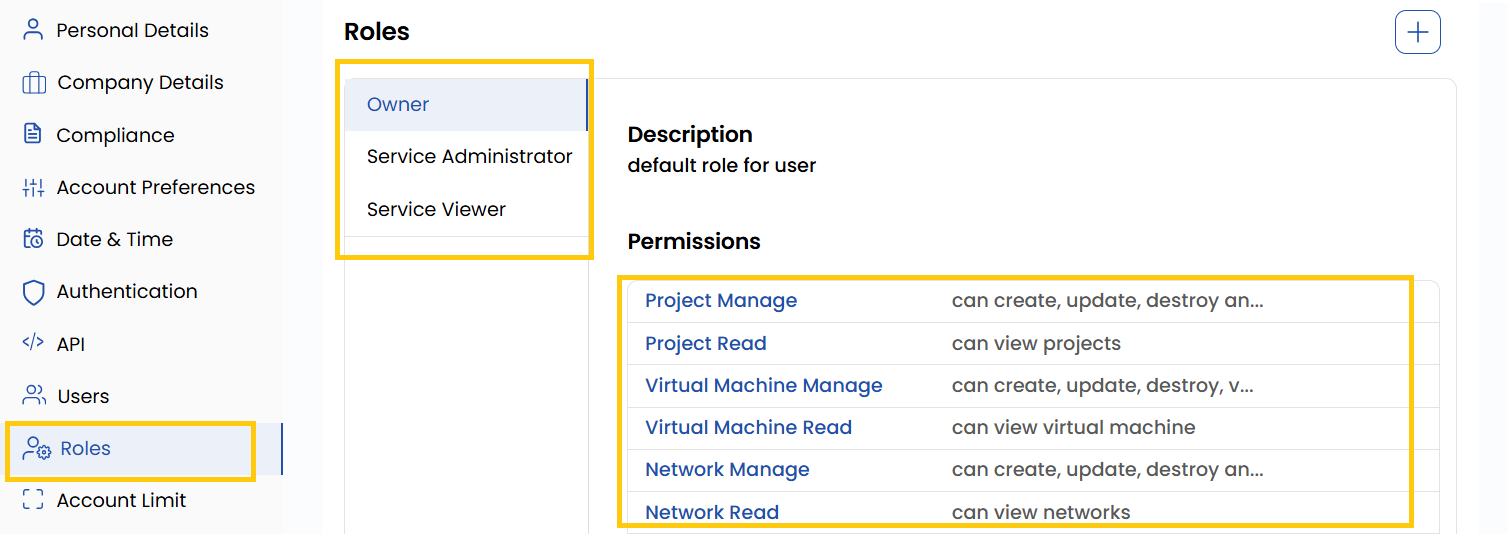
Assign User Roles and Permissions
The Roles section allows you to assign and manage specific roles and permissions for each user within your organization.
- Navigate to the Profile section from the left-hand menu.
- Select Roles to view and assign permissions.
- Click Add New Role to create a new role with customized permissions.
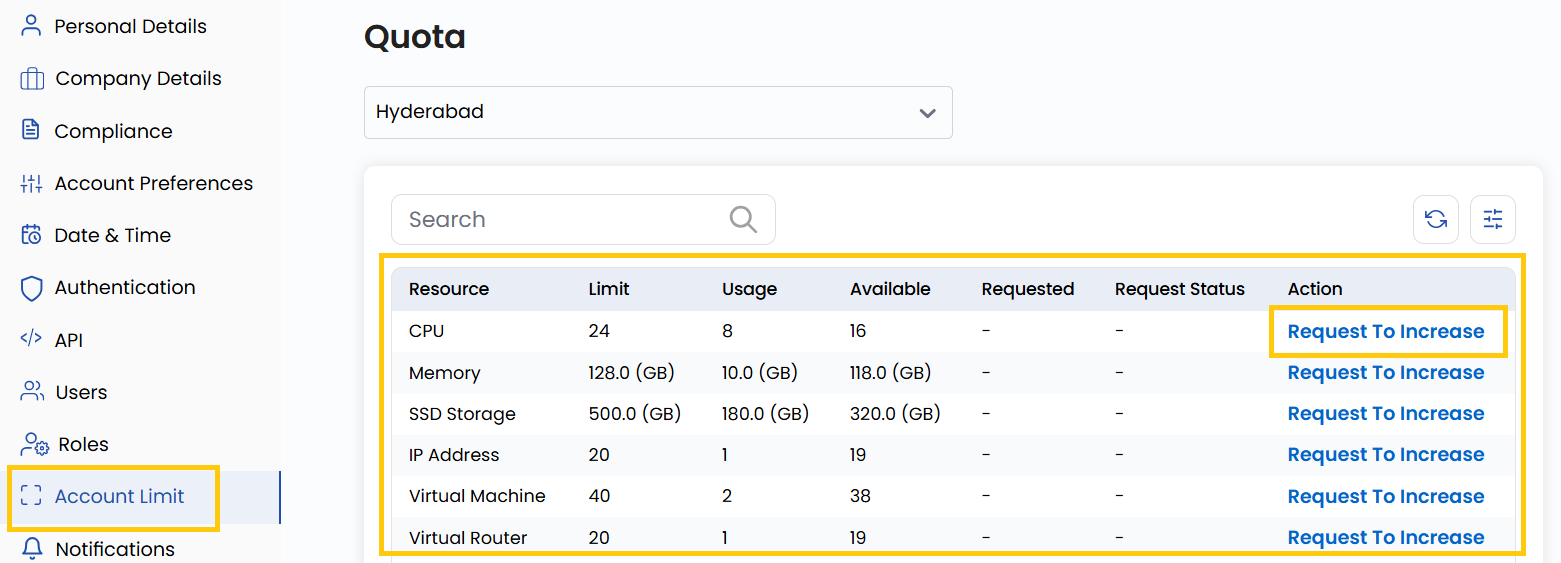
Set Account Limits
The Account Limits feature allows users to view resource usage and request increases as required.
- Navigate to the Profile section from the left-hand menu.
- Select Account Limit to view the resource allocation table.
- Click Request To Increase to submit a request for additional resources.
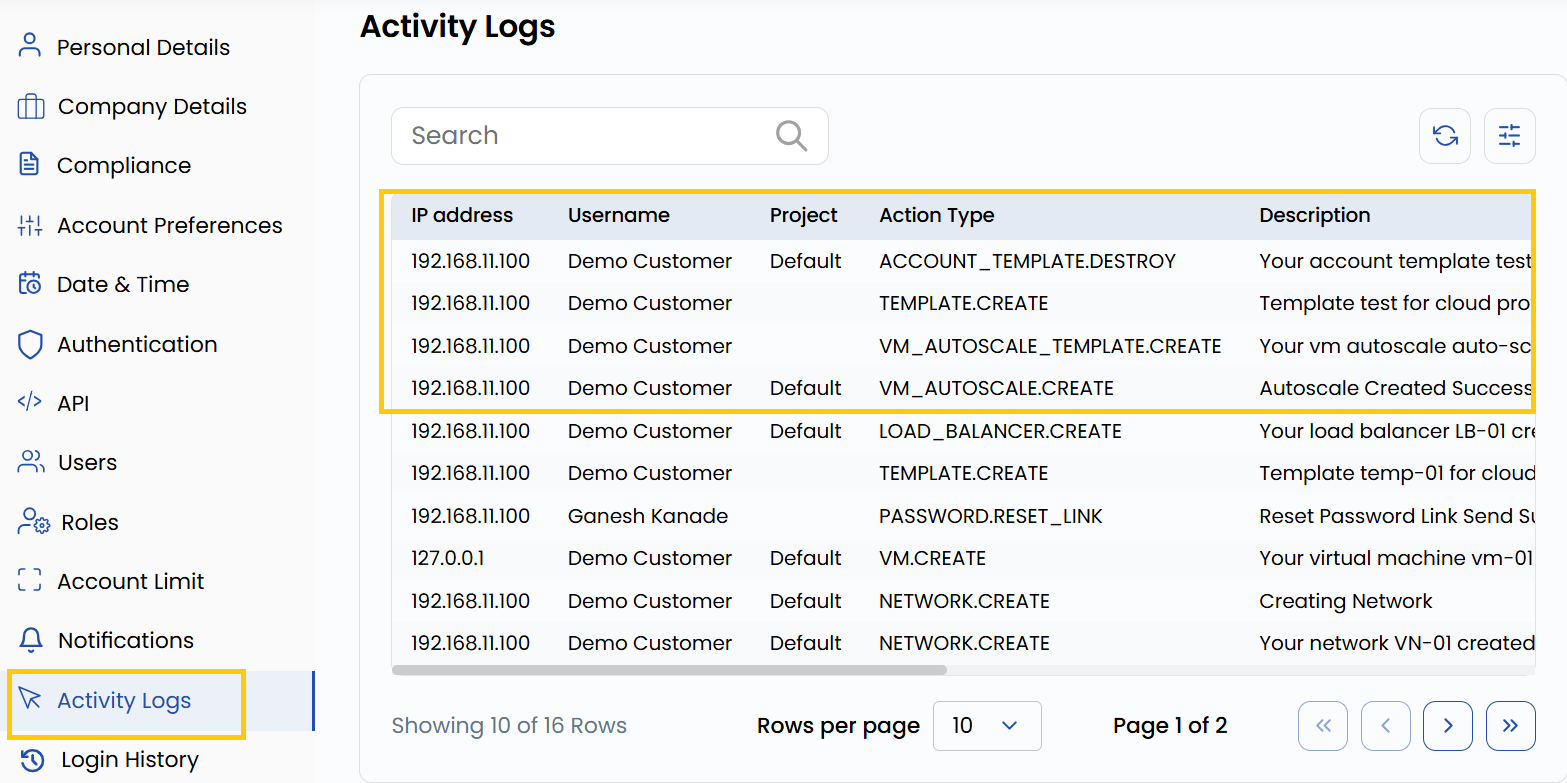
Track Activity Logs
The Activity Logs feature provides a detailed record of user and system activities within the platform.
- Navigate to the Profile section from the left-hand menu.
- Select Activity Logs to monitor system actions and changes.
- Use the search bar to filter logs based on keywords.
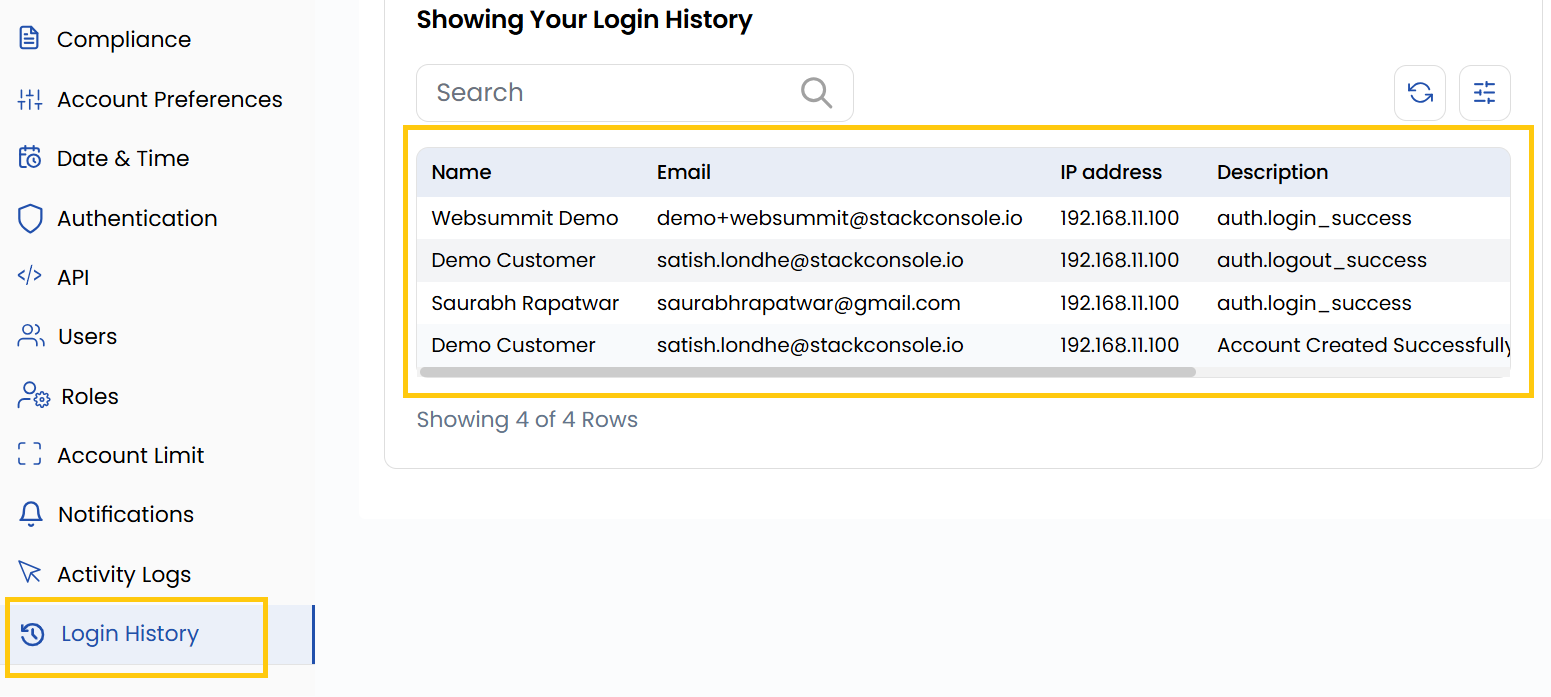
Review Login History
The Login History feature allows users to monitor account access and verify security by reviewing login activities.
- Navigate to the Profile section from the left-hand menu.
- Select Login History to view login records.
Conclusion
By following this guide, you can efficiently manage your Stack Console profile, enhance security settings, and customize your account to meet your needs. Keeping your profile up-to-date ensures smooth account management and improved security within the platform.